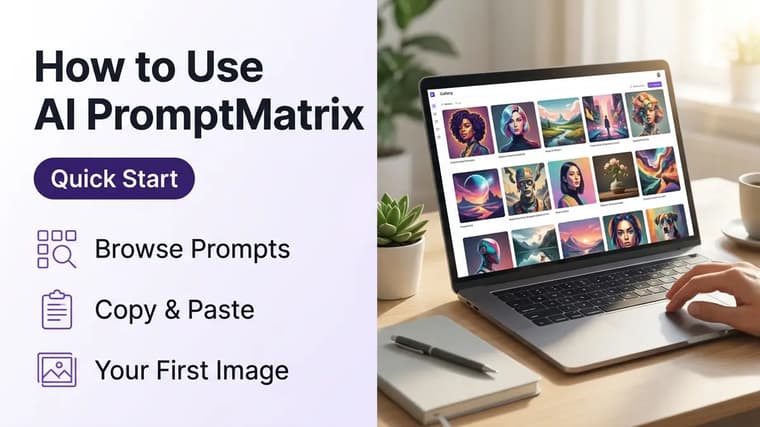
AI PromptMatrix is a gallery of tested, copy-ready prompts for image tools like ChatGPT, Gemini, Midjourney, Grok, and Qwen Image. Every post shows real example images next to the exact text that produced them, so you never have to guess whether a prompt actually works. This guide walks you from browsing the site to generating your first image, including the small details — like attaching your own photo at the right moment — that decide whether your result looks like the example.
Step 1: Browse the Explore Page or a Tool Page
Start at the explore page. It shows the full prompt library as a grid of cards, each with a preview image, a title, and a label for the AI tool it was made with. Scroll until something catches your eye, or use the search and category filters to narrow things down — portrait styles, 3D trends, retro edits, and so on.
If you already know which tool you use, go straight to that tool's page instead. The ChatGPT prompts page only shows prompts written and tested for ChatGPT; the Gemini prompts page does the same for Gemini. This matters more than beginners expect: a prompt tuned for Midjourney's parameter syntax will confuse ChatGPT, and a conversational photo-edit prompt written for Gemini won't do anything useful in Midjourney.
Filter by tool
If you only have a free account with one tool, filter by that tool first. Every prompt on a tool page is confirmed to work there, so you skip the trial-and-error of adapting prompts across models.
Step 2: Open a Prompt and Read the Card
Click any card to open the full prompt post. Before you copy anything, take thirty seconds to read the whole card. Each post contains a few distinct pieces of information, and each one changes how you should use the prompt:
- The example images. These show what the prompt actually produces. Look at more than one if the post includes several — the variation between them tells you how consistent the prompt is.
- The tool label. This is the AI tool the prompt was tested in. Use the prompt in that tool for the closest match to the examples.
- The model notes. Some posts mention a specific model or mode — for example, an image-editing model inside Gemini versus plain text chat. If the notes say the prompt needs an uploaded photo, that is not optional; the prompt is written to transform an input image, not to generate one from nothing.
- The prompt text itself. The exact wording, displayed with a copy button so you get it character-for-character.
Attach reference images
Reference images matter. If a prompt card's examples clearly show a real person restyled — same face, new outfit or setting — it is a photo-edit prompt. Running it without attaching a photo will produce a generic stranger. If the examples look fully invented, it is a text-to-image prompt and no upload is needed. When in doubt, our post on reference images vs. text prompts explains the difference in depth.
Step 3: Copy the Prompt
Hit the copy button on the prompt block. This copies the complete text exactly as tested — line breaks, phrasing, and all. Resist the urge to retype it by hand; small wording changes ("photo" instead of "photograph", dropping a lighting phrase) can shift results more than you would think, and you want your first run to be a faithful baseline.
Step 4: Paste It Into Your AI Tool
Open the tool named on the card and paste the prompt into the chat or prompt box.
If the prompt is a photo-edit style — outfit changes, retro portrait looks, figurine transformations — attach your own photo first, then paste the prompt in the same message. Order matters in most chat-based tools: the image should be part of the message the prompt arrives with, so the model treats your photo as the subject of the instructions.
A quick checklist for the photo you attach:
- Use a clear, well-lit shot where your face is fully visible.
- Avoid heavy filters, sunglasses, or extreme angles.
- One person in frame works far better than a group photo.
If the prompt is pure text-to-image, just paste and send.
Step 5: Customize the Placeholder Parts
Many prompts include parts that are meant to be swapped: a color, a background, a piece of clothing, a text label. These are usually obvious in context — if a prompt says the figure wears a "red traditional saree" and you want blue, change that one word and leave the rest alone.
The safe way to customize is one change at a time. Swap the color, run it, check the result. Then change the backdrop, run again. If you rewrite four things at once and the output falls apart, you won't know which edit broke it.
Keep useful phrases
Don't delete phrases you don't understand. Lines like "shallow depth of field" or "keep the facial features exactly the same" look like filler but are doing real work — the first controls the blurred background look, the second prevents the AI from redrawing your face. Remove them and the result changes in ways you probably didn't want.
Step 6: Iterate on the Result
Your first output will often be 80% right. In conversational tools like ChatGPT and Gemini, you fix the remaining 20% by replying, not by starting over. Follow-ups like "make the lighting warmer", "zoom out to show the full outfit", or "same image, but change the background to a beach at sunset" keep everything you liked and adjust only what you asked for.
If the result is badly off — wrong subject, wrong style — don't patch it with five follow-ups. Start a fresh chat, re-paste the original prompt, and re-attach your photo. Long editing threads accumulate drift, and a clean start with the tested prompt is usually faster.
First session example
A realistic first session: you copy a retro portrait prompt from the Gemini page, attach a selfie, and get a great image where the outfit color is slightly off. You reply "keep everything identical but make the saree deep emerald green" — done in one follow-up. Total time: about two minutes.
A Starter Prompt to Try Right Now
If you want to test the full workflow immediately, here is a complete text-to-image prompt that works in ChatGPT, Gemini, and most other tools with no photo upload required.
A cinematic close-up portrait of a street food vendor at a night market, steam rising from a sizzling pan, warm lantern light on one side of the face and cool blue neon on the other, shallow depth of field with glowing bokeh in the background, rich color, shot on a 50mm lens, photorealistic
Paste it in, see what you get, then change one detail — the location, the light colors, the lens — and run it again. That single loop of copy, run, tweak, run is the entire skill. Once it feels natural, you're ready for more advanced techniques in how to write better AI image prompts.
Frequently Asked Questions
❖Do I need an account on AI PromptMatrix to copy prompts?
No. Browsing and copying are free and open — every prompt's copy button works without signing up.
❖Can I use a prompt with a different tool than the one on the card?
Often, yes, but expect differences. Descriptive text-to-image prompts transfer reasonably well between ChatGPT, Gemini, and Qwen Image. Prompts with tool-specific syntax or photo-editing instructions transfer poorly, so start with the tool listed on the card.
❖Why doesn't my image look like the example?
The three most common reasons: you used a different tool than the card specifies, you didn't attach a photo for a photo-edit prompt, or you modified the prompt before establishing a baseline. Run the exact prompt in the exact tool first, then customize.
❖Can I use images I generate from these prompts commercially?
Usage rights come from the AI tool you generate with, not from the prompt. Check the terms of ChatGPT, Gemini, or whichever tool you use — policies differ, especially for images that include a real person's likeness.