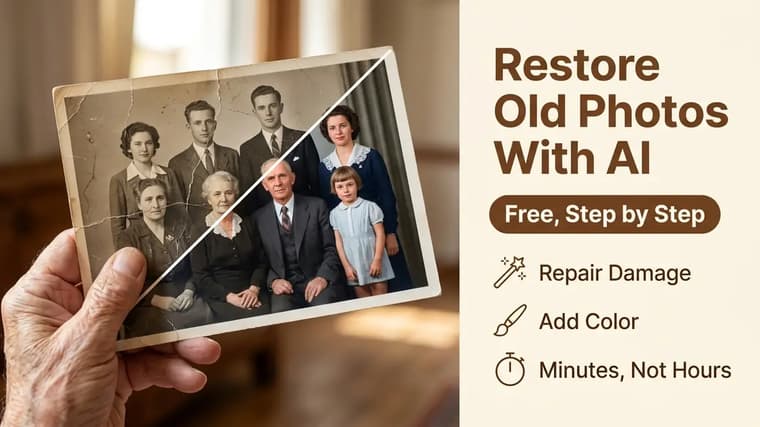
That shoebox of creased, faded family photographs is more recoverable than you think. Modern AI image tools like Gemini and ChatGPT can repair scratches, rebuild faded contrast, and even colorize black-and-white portraits in a single conversation, no Photoshop skills required. This guide walks through the full process, from capturing the original properly to writing a restoration prompt that fixes damage without turning your grandmother into a stranger.
Step 1: Capture the Original as Well as You Can
The restoration can only ever be as good as the copy you feed the AI. Before you write a single prompt, get a clean digital version of the photo.
If you have access to a flatbed scanner, use it at 600 DPI or higher. A scanner gives you even lighting and no perspective distortion, which matters a lot when the AI later tries to distinguish "damage" from "detail."
If you only have a phone, you can still get a very usable capture:
- Shoot in indirect daylight near a window, never under a ceiling light that throws glare across the print.
- Lay the photo flat on a dark, matte surface and hold the phone directly above it, parallel to the print.
- Turn off the flash. Glare from glossy prints reads as white damage to the AI.
- Fill the frame with the photo, but leave a small border so nothing gets cropped.
- Take three or four shots and pick the sharpest one at full zoom.
Photograph safely
If the photo is stuck behind glass in a frame, do not force it out — old prints tear. Instead, angle yourself slightly so the window reflection moves off the image, then crop and straighten the shot afterward.
Step 2: Upload and Describe What You See
Open Gemini or ChatGPT, attach the image, and tell the model exactly what is wrong with it. Vague requests like "fix this photo" produce inconsistent results because the model has to guess what you consider damage. Specific requests work dramatically better: name the scratches, the fold line, the water stain in the corner, the faded contrast.
Equally important is telling the model what NOT to change. Faces are the whole point of a family photo, and identity drift is the most common restoration failure. Say it explicitly.
Restore this old photograph. Repair the visible damage: remove the scratches, dust spots, and the crease running through the image, and fix the faded, low-contrast areas. Keep every person's face, expression, age, and features exactly identical to the original — do not beautify, smooth, or alter anyone. Preserve the original composition, clothing, background, and grain character. Colorize it with natural, historically plausible colors: realistic skin tones, muted fabric colors appropriate to the era, and soft neutral background tones. The result should look like a well-preserved photo from that time period, not a modern digital image.
If the photo is already in color and just faded, drop the colorize sentence and ask instead to "restore the original colors to how they would have looked when the photo was new, without oversaturating."
Step 3: Review the Result Like a Skeptic
When the restored image comes back, do not just glance at it — compare it side by side with the original at full size. Check these in order:
- Faces first. Are the eyes, nose shape, and smile actually the same person? AI models love to subtly "improve" faces.
- Hands and jewelry. These are frequent hallucination zones; a wedding ring can vanish or a finger can merge.
- Text and dates. Handwriting, signs, or a date stamp in the corner often gets rewritten into gibberish.
- Colors. Colorization is an educated guess. If Uncle's army uniform comes back the wrong shade, tell the model the correct color and regenerate.
Heavily damaged faces
The AI does not know your family. If a face was badly damaged in the original — torn, water-stained, or blurred — the model will invent a plausible face, not recover the real one. Treat heavily reconstructed faces as an artist's interpretation, and say so if you share the image with relatives.
Step 4: Iterate in Small, Specific Steps
Rarely is the first pass perfect. The good news is you are in a conversation, so you can refine. Effective follow-ups are narrow and concrete:
- "The skin tones look too orange — make them more natural and slightly paler."
- "You removed the necklace she was wearing. Restore it from the original."
- "The background became too sharp and modern-looking. Return the soft blur from the original."
One correction per message works better than a list of five, because each regeneration can introduce new drift. If a result goes badly wrong, re-upload the original scan and start fresh rather than stacking edits. For more on why iterating from the source beats iterating on outputs, see reference images vs text prompts.
Button correction
A reader restored a 1962 wedding photo with a diagonal fold across the groom's jacket. First pass: fold gone, but the jacket buttons had moved. Follow-up: "Restore the jacket buttons to their exact positions in the original photo." Second pass was clean. Total time, about four minutes.
When NOT to Expect Miracles
Being honest about limits will save you frustration:
- Severely blurred photos stay soft. AI can sharpen edges slightly, but it cannot recover focus that was never captured. "Enhanced" detail on a blurry face is invented detail.
- Missing pieces are fabrications. If a corner is torn off, whatever the AI fills in is fiction — fine for a background, risky for a person.
- Group photos with many small faces drift the most. The smaller the face in the frame, the more freely the model redraws it. Crop and restore important faces individually if identity matters.
- Extremely low-resolution scans limit everything. If your capture is a 400-pixel-wide photo of a photo, rescan before blaming the prompt.
Colorization is interpretation
Colorization is interpretation, not recovery. A black-and-white photo contains no color information at all — the AI infers plausible colors from context. If the exact color of a dress matters to your family, ask relatives first and specify it in the prompt.
Preserve the Original — Always
Restoration should be additive, never destructive. A few habits worth adopting:
- Keep the untouched scan in a separate folder, ideally backed up to cloud storage, before you generate anything.
- Save AI outputs under new filenames like "wedding-1962-restored-v2" so versions never overwrite each other.
- Store the physical print somewhere flat, dry, and dark. The AI copy is a convenience; the original is the artifact.
- If you print the restored version, note on the back that it is an AI restoration and where the original lives.
Also worth knowing: ownership of AI-modified images is genuinely murky, especially for photos taken by professional photographers decades ago. Our overview of who owns AI-generated images covers the practical side.
Once you have the workflow down, a whole album can be brought back over a weekend. For ready-made starting points, browse the Gemini prompts collection or the wider explore page. For deeper editing techniques, the Gemini photo editing guide is a natural next step.
Frequently Asked Questions
❖Is restoring old photos with AI actually free?
Yes, for typical personal use. Gemini and ChatGPT both allow image uploads and image generation on their free tiers, with daily limits. A handful of family photos fits comfortably within free usage; a 300-photo archive may require patience or a paid tier.
❖Will the restored photo look obviously AI-made?
Not if you review carefully. The tells are overly smooth "plastic" skin, altered faces, and invented background detail. Prompting for preserved grain and identical faces, then comparing against the original, keeps results looking like photographs rather than renders.
❖Can AI restore a photo that is torn in half?
It can generate a seamless image from the two halves, but everything along the tear is reconstructed guesswork. For backgrounds and clothing this is usually fine; for a face split by the tear, expect an approximation rather than a true recovery.
❖What resolution should I scan old photos at?
600 DPI is a solid standard for prints up to 5x7 inches; go to 1200 DPI for very small prints you may want to enlarge. Higher input resolution gives the AI real detail to work with instead of forcing it to invent texture.